
Last St. Patrick’s Day I made a super cute suspender skirt from Little Lizard King. I went all out with the holiday theme and used sparkly shamrocks that definitely made it a St. Patrick’s Day skirt as opposed to a green spring skirt.

This year I wanted to do something different, something that my little sweet pea could again (well, that skirt does actually still fit…) throughout the coming months. I’ve had my eye on this pleated shirt tutorial and wanted to try something similar.
I was able to get this ~18mo size tunic from a 0.675yd remnant I picked up at JoAnn’s a year or so ago but I needed to use other fabric for the binding.
To start, you need to make bias tape out of a 12.5″ x 12.5″ square using this method.
For this shirt, you should mostly follow that tutorial in the beginning. I used existing shirts and patterns to draw my own pattern pieces, making sure to slightly adjust the armscythes for a sleeveless tank.
 The bottom is another pattern with sleeves and the top pattern show the sleeveless adjustment.
Cut the front bodice 1.5″from the fold and cut the back 0.75″ from the fold. Then cut the back at the fold so you have two mirror images.


With the right side up mark the center of the front bodice and add two pleats on each side, pressing them out. Turn the front to the wrong side and mark where you want the pleats to end. Because I was making an 18mo tunic, I made my markings 4.5″ below the neckline but a larger shirt would need longer pleats. My intention for this shirt was to have a fitted chest and loose flowing waist.
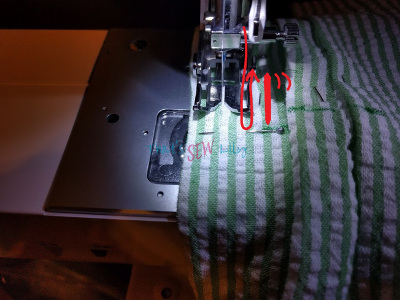 From the wrong side, carefully open each pleat so you can stitch along the fold line. Start from the neck and then backtrack 1″ from the markings so the pleats will stay in place.


Take the back pieces and fold each side 0.75″ from the center edge and press. Then cut a 3″ strip of bias tape, fold it again and sew the open end. Create a loop and pin it 1″ from the neck on the right piece. (I initially forgot this step so my pictures are out of order) Baste in place and then serge or zigzag stitch the edges.


With right sides together, pin in place. Put special pin in place to mark where you need to stop sewing. I did 5″ for my shirt but larger sizes would need a longer opening. Start sewing at that marking, securing the thread.

With the right side of the back facing up, topstitch around the opening. Take extra care across the bottom and at the button loop closure.
Sew the front and back pieces together at the shoulders and press the seams towards the back.


Take the bias tape, fold the end inside 0.5″ and tuck one edge of the neck opening in. Clip the bias tape around the neck, making sure that the pleats are folded towards the center. Cut the bias tape 0.5″longer than you need and tuck the other edge inside as well. Stitch in place.

When clipping the bias tape to the armscythes, leaving a 0.5″ overhang on both ends. Stitch in place. Then repeat with the other side.

Line up the side seams and sew.


Before sewing the button in place, cut a small piece of lightweight interfacing and iron it onto the back of the fabric. Sew the button in place.
Hem the bottom by turning it up 0.25″ and then 0.75″. Now you’re done!


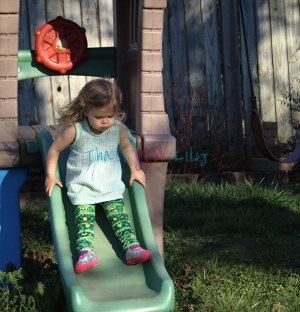
I also made these holiday-specific Charlotte Leggings* from Laela Jeyne Patterns using some cheap leggings. They did not even try to match the patterns along the seams and it was driving me crazy so I cut them up to redo it.
~~this post contains affiliate links marked with an asterisk~~
